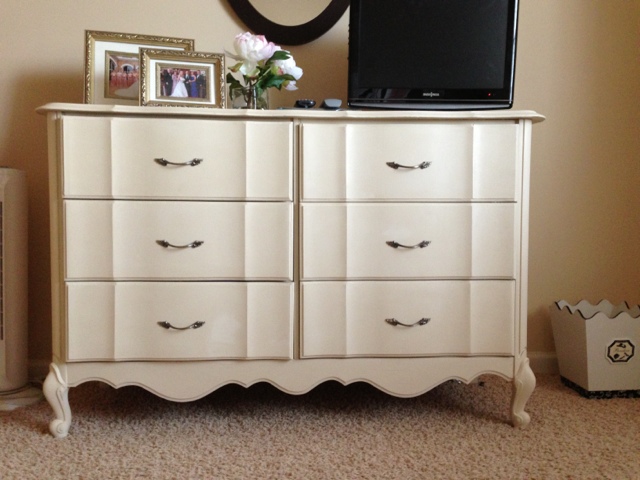
When we moved from a 700 square foot one bedroom to a large two bedroom, I was really excited to have a guest room in our home for the first time. Unfortunately, moving your home, two cars, and a boat 700 miles can be really expensive so I wanted to do this guest room on a budget. While I already had bedding and some wall decorations, we didn’t have a mattress and box spring and I had my heart set on a beautiful upholstered headboard. To do the remainder of the room, I decided to hit up some second hand shops in search of the perfect dresser to re-do. Not only would this save lots of money but it would work perfectly with the shabby chic look I was going for.

I hit up Habitat for Humanity’s ReStore, several Goodwills, a couple antique stores, and finally found this dresser (and matching night stand) at the Salvation Army for $30. I bought it right then and there then hurried to Corey’s office to swap cars so I could bring it home. I think he thought I was totally insane bringing this into our home. Its hard to tell from the photo but it was a “lovely” shade of beige-y yellow with stenciled orange flowers on all the drawers. I couldn’t help but fall in love with the dainty feet and knew right away it would be perfect for our guest room…eventually.
When I got it home, I cleaned it up outside and then vacuumed all the crevices. My next stop was Black Lion in Charlotte where I purchased Annie Sloan’s chalk paint in Old Ochre. I cannot sing enough praise about this stuff. It isn’t necessary to sand or prime your furniture beforehand and it gives such a perfect shabby chic look. Its a little pricey (about $30 for 32 ounces) but a little goes a long way. I’m only halfway finished with my container and I’ve done the dresser, nightstand, and a bookshelf.

Next, I removed the drawers and unscrewed the hardware. I spread a huge drop cloth across the floor and painted one coat of chalk paint and then let it dry for several hours. Thin coats look best for chalk paint so make sure not to go overboard. Then, I applied a second coat and let it dry overnight.

The next day, I applied a coat of Annie Sloan’s clear wax. I’d never waxed furniture before and was a little intimidated. I was tempted to just slap a coat of polyurethane on and call it a day but I’d read that this was really not recommended when using chalk paint. There are tons of YouTube videos for using this wax. Again, less is more. Just scoop a little wax onto a paper plate and swirl some on your brush. Then, apply in a circular motion and wipe with a clean cloth (I used an old white t-shirt.) The wax seals the paint and protects the piece of furniture. Chalk paint is made to be distressed so if you don’t seal it, your hard work could be damaged.
I let the wax set over night, then re-attached the hardware and put the drawers back in. I slid it into place in the room and styled it with some cute accessories.


I love it!!! You did a fantastic job!
Oh my goodness it looks PERFECT! What a find!
What a nice find- that is so beautiful! I'm the absolute worst at picking antique furniture, thanks for the inspiration!
Gorgeous! Great job 🙂
Looks great!! 🙂